
 Share This Page
| Home | | Ruby | | GPS Activities | | | Share This Page |
A method to link your GPS receiver to Google Maps and Google Earth
All content Copyright © 2008, P. Lutus — Message Page
Version 2.0, 03/16/2008 (accommodates Google Earth)
Introduction | The Application | Documentation | Quick How-To | Google Earth(double-click any word to see its definition)

Here is the data flowchart (remember it's bidirectional):
GPS
ReceiverSerial
InterfaceRuby GPS
Data TransceiverPlain-Text
Data FilesGPSMap
Web Page
Maps
Let's discuss each of these elements:
If we limit the discussion just to Garmin GPS receivers, there are dozens, and they each speak a slightly different dialect of "Garminese", an unnecessarily complex, poorly documented communications protocol invented by Garmin seemingly as a way to drive a wedge between Garmin's customers and its products.
In this project I have managed to accommodate all the Garmin units I own (GPS III, GPS V and GPSmap76CS, photograph this page), but I can't speak for those units I have not personally sat with and bludgeoned into submission. All I can say is you won't get any assistance from Garmin — their published documentation is a testament to the triumph of narcissism over common sense. The communications interface is so difficult and baroque that even Garmin's own software won't function with many of their own GPS receivers.
Don't get me wrong — Garmin makes great GPS receivers, and their position in the business is well-earned. As the years pass and as new GPS features appear, I keep buying more Garmin receivers, because I think they're the best value for the money. But if Garmin had to survive on the strength of their communications interface and its documentation, they would expire in a fortnight.
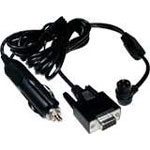
For this project you will need a Garmin GPS receiver, preferably a relatively new one (I have tested and can communicate with GPS III through GPS V and various GPSmap76 models). You will also need a Garmin serial interface cable (Garmin part # 010-10141-00) or (better) a combination power/data cable (Garmin part # 010-10165-00) if you have a GPS receiver similar to the ones shown on this page.
Finally, because of the widespread disappearance of the old-style (RS-232) serial interface, you may need to acquire a serial USB adaptor, a gadget that allows you to send old-style serial signals to a computer that only has USB ports. One that I prefer (because it's cheap and works with Linux) is the IOGEAR USB 9, although there are many varieties of this item.
There are many other options for this part of the project. There are now cables that convert a Garmin GPS receiver's output directly to USB format, without requiring a two-step scheme such as I have described here. I don't describe these options only because I have no experience with them.
This Ruby script is one of two major efforts in this project (the other is the Google Maps interface). The script requires that a Ruby interpreter be present on your system (get Ruby here for Linux or Windows). I have tested the script on both Windows and Linux.
The script communicates with your Garmin GPS receiver, either reading or writing sets of waypoints (navigational jargon for geographical positions). On the computer side of the transaction, the script reads or writes plain-text data tables that look like this:
36.21049,-112.06158,0,New0,New Description
36.05458,-112.12234,0,New1,New Description
36.04022,-111.82983,0,New2,New Description
36.21049,-112.05849,0,New3,New Description
This data format is a very simple and traditional "comma-separated values" table. The data fields are:
Latitude (decimal degrees), Longitude (decimal degrees), Altitude (meters), Waypoint Name, Comment
By the way, the line above is meant only to describe the fields, it should not be included in your data files.
Not all Garmin receivers provide altitude data (not even within my small set of three receivers), but my present favorite (GPSmap76CS) does, so I decided to include an altitude field. The newer Garmin receivers automatically place a date and time string in the comment field, but the older receivers don't, and date and time handling is so erratic and inconsistent between receivers that, after some research, I decided not to try to manage an explicit date and time field.
To acquire the Ruby script, first install Ruby if it is not already installed, then download a copy of the script in plain-text form or as a pretty-printed listing. Download the script to your system, name it "garmin_read_write.rb", make it executable if you are running Linux.
To use the script, first activate and connect your Garmin GPS receiver as shown in the previous section, then decide whether you are reading or writing GPS data:
$ garmin_read_write.rb -r filename.csv
$ garmin_read_write.rb -w filename.csv
$ garmin_read_write.rb -r
The '$' at the left of each command is a command prompt, you don't type it, it's there only to remind you that this is a shell session. Obviously, these commands can be integrated into a menu-driven program or made into a set of desktop shortcuts.
To acquire some experience with GPS data conversion, I strongly recommend that the interested reader acquire a copy of GPSBabel, a first-rate data conversion program that can convert between a great number of different data formats, and can even communicate directly with a large number of GPS receivers (many more than my script can).
The reason I am not using GPSBabel to acquire my own GPS data is because it produced no acceptable data format that had the right data fields and that was plain-text and hand-editable. After some research I realized I would have to write a Ruby data filtering script to convert one of the more comprehensive GPSBabel-supported data types to a format suitable for this project, and once I accepted the need for a Ruby script, I decided I might as well save a step and read the Garmin receiver directly.
Nevertheless, GPSBabel is a terrific program, and owners of GPS receivers other than recent Garmin units might consider using it to get their data into this project (with some post-reception data format conversion).
This is more a rant than part of the documentation. In my three decades in the software business I have seen a gradual move away from data transparency toward more and more impenetrable, proprietary, encrypted, indecipherable data formats, in circumstances where data obscurity worked against the desired goal. There are places where encryption is very desirable, but many others where a plain-text data format is preferable. Even where encryption and/or compression is desirable, it should always be possible to convert the data into a human-readable form, if the human in question has proper authority.
Microsoft is notorious for creating proprietary data formats and not publishing their internal workings, for obvious reasons. But this strategy is about to backfire in a big way for Microsoft and other corporations who try to hold their customers hostage to a single vendor with a single outlook.
The Open Document Format (ODF) project is a good example of a worldwide effort to create open, non-proprietary data formats. Many governments and educational institutions now realize the advantages of this approach and are beginning to mandate the use of ODF and the conversion of all older documents into the new, open format.
Microsoft has been fighting ODF almost as hard as they fought the open-source software movement, and with about the same measure of success (very little). But this is not a struggle that will end quickly or easily, because there is a natural tendency to circle the corporate wagons around the hapless pilgrims and try to keep them from escaping into the countryside.
Like all my projects, GPSMap is as open as I could make it. The Ruby script is as easy to read and change as possible, given the cryptic nature of the Garmin protocol. The data format I chose (comma separated values) is so open and transparent that it's embarrassing to many sophisticated computer scientists. The Web interface to be discussed next is composed of HTML and JavaScript (and a small bit of CSS), all in plain-text form.
Someone will object and say that proprietary data formats are perfectly fine if there is only one software company that does everything for everyone. Yes, but no such software company exists, or can exist in principle. The bottom line is that open documents and open-source software serves the needs of customers, while closed documents and proprietary software can only serve the needs of a corporation at the expense of its customers.
Pardon my rant.
This Web page serves as an interface between Google Maps, an incredible data source of street maps and satellite imagery, and plain-text data files the reader can create using his GPS receiver. Again, I emphasize that this project is bidirectional — you can create data points in the Google Maps interface, save them as a data file, and move the data to your GPS receiver, or you can create data in your GPS receiver and import it into Google Maps.
We have already covered the procedure for creating data files on the GPS receiver side. Now we discuss the procedure for making data files from points created in Google Maps. I ask that my readers pay close attention to the next part, because it explains how to transfer data into and out of this Web page, and why it isn't totally automatic.
When I designed this page, I decided it should not require any special visitor privileges in order to interface with Google Maps and the user's own data — no special plugins, no passwords entered, no security compromises. What this means is this page cannot directly read or save files from your computer. Instead, the user is obliged to use the system clipboard to transfer data. This involves a few extra keystrokes or mouse gestures, but in exchange it avoids any number of potential security issues.
To move data to and from the system clipboard, you can either use your mouse or the keyboard. Not wishing to seem excessively old-fashioned, I'll discuss the mouse approach. Here is the basic procedure:
Let's do an exercise. Here is a set of data points I want you to move into the GPSMap interface above:
40.99648,-108.92944,0,New0,NW Colorado
41.00270,-102.05200,0,New1,NE Colorado
36.99323,-102.04308,0,New2,SE Colorado
36.99899,-109.04514,0,New3,SW Colorado
40.80134,-109.05579,0,New4,NW Colorado
Do it this way:
Here are some more details about the GPSMap interface:
To save data points that have been created or changed in the map display, perform the clipboard operation in reverse:
A few words about Google Maps. The alert reader will notice that the main Google Maps page at http://maps.google.com/maps produces maps that are somewhat different than maps created here. The reasons are rather complicated, one of them having to do with two different sources of location information ("NAVTEQ" for the main Google Maps page and "TeleAtlas" for client sites like this one that use Google maps). Apparently NAVTEQ would not allow their data to be used in client sites.
Another issue is differences in the feature set — it seems there are some features available at the main site that are not provided to client sites, such as (at the time of writing) a new map feature called "terrain". Differences like this are likely to remain true as time passes.
Finally, there are rumors that Google may eventually inject advertising into the maps shown on client sites. If this should happen, I ask that my readers alert me and I will take this page down. I have always been an opponent of the malignant commercialization of the Internet, but I would like to display, and contribute to, some of its more creative content. However, once a provider starts bundling advertising along with content, I stop coöperating.
| Home | | Ruby | | GPS Activities | | | Share This Page |